Building & Managing Web Sites
Team Project Database Connectivity
| Home | Lectures | Labs | Team Project | Resources |
Database connectivity
You will use FrontPage 2000's database connection features to link to an existing database on Deathstar's SQL Server. The wizard will insert a large amount of code in you page to display the results in a table. You will then alter the top and bottom of the page to make give it a consistent look-and-feel with the rest of the site. A lot of the data is pretty silly--the main goal is to test out using the wizard. You can also use this same technique in you own child web if you want to experiment/test the feature.
1. Create a new page for your staff directory. The page MUST end with a .asp extension rather than .htm. This tells the webserver that there is code in the page it will need to handle.
2. Go to the INSERT menu and select "Database" and "Results..."
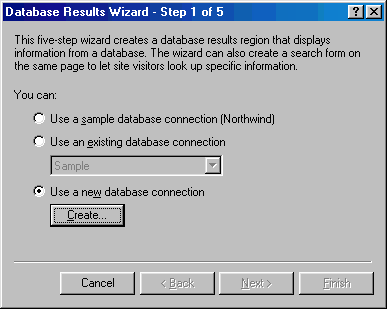
3. You have now started the Database Results Wizard. Select "Use a
new database connection" and click on "Create..."
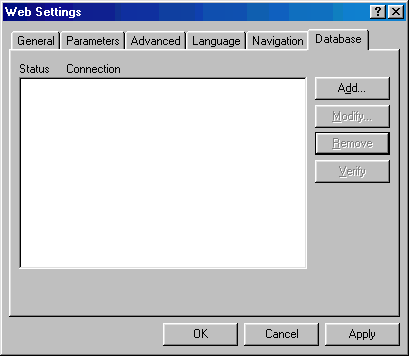
4. This page shows the various attributes of your child web, including
the databases currently associated with your child web. Click on
"Add..."
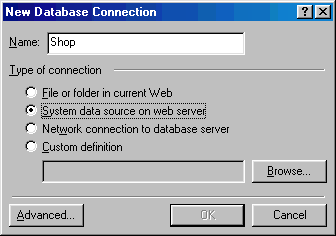
5. Name your database connection "Shop", click on "System
data source on web server" and click on "Browse..." to look
at the pre-defined databases on Deathstar.
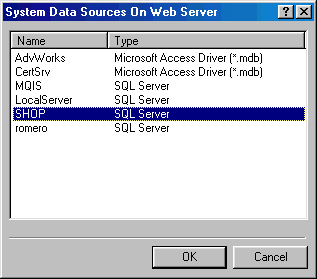
6. Select the SHOP data source and select OK.
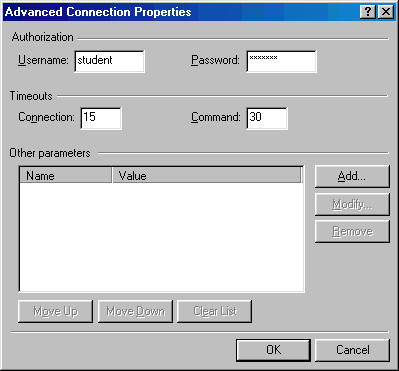
7. Back in the "New Database Connection" window
(see step 5), click on the "Advanced" button and add a Username of
"student" and a password of "student". The SQL Server
won't let you access the database without a valid username/password, and I
set these up earlier for your use. Click on "OK", and then
click on "OK" in the "New Database Connection" window.
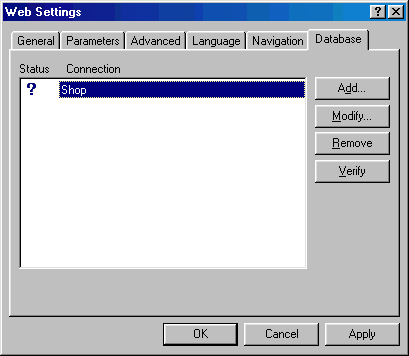
8. Your database connection is listed. Highlight your
connection and click on the "Verify" button to make sure it works
(question mark changes to a check). Then click on the "OK"
button.
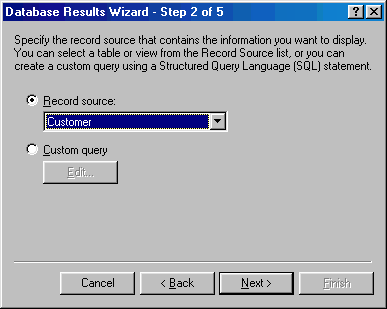
9. The SHOP database has a number of different tables.
Select the "Customer" table and click "Next".
10. We don't want to see all the fields in the table, so
click on the "Edit List" button.
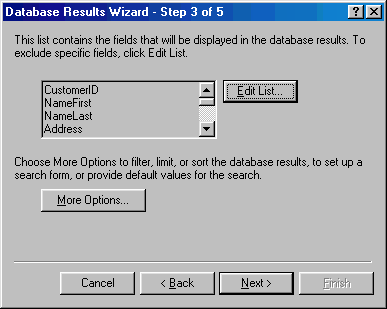
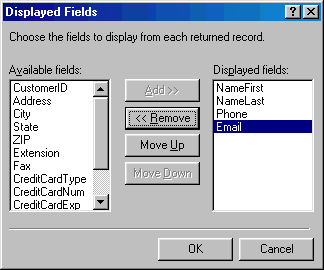
11. Use the "Remove" button only select the
fields shown below. Click on the "OK" button, then click on
"Next" to go to the next step of the wizard.
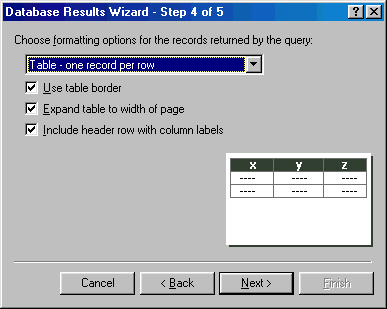
12. Accept all of the defaults and click "Next".
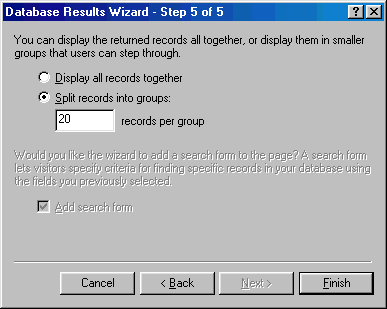
13. Split the records into groups of 20 and click on
"Finish".
14. Your page now has a table with a number of different
components on it. You can right-click on all of these and view/edit their
properties. You must look at the page in your browser to actually see the
data. Edit the top and bottom of the page to match the rest of your
site, being careful to not alter the table.
CSC 120 http://www.valtara.com/CSC120/
Copyright 1999, 2001 Valtara Digital Design